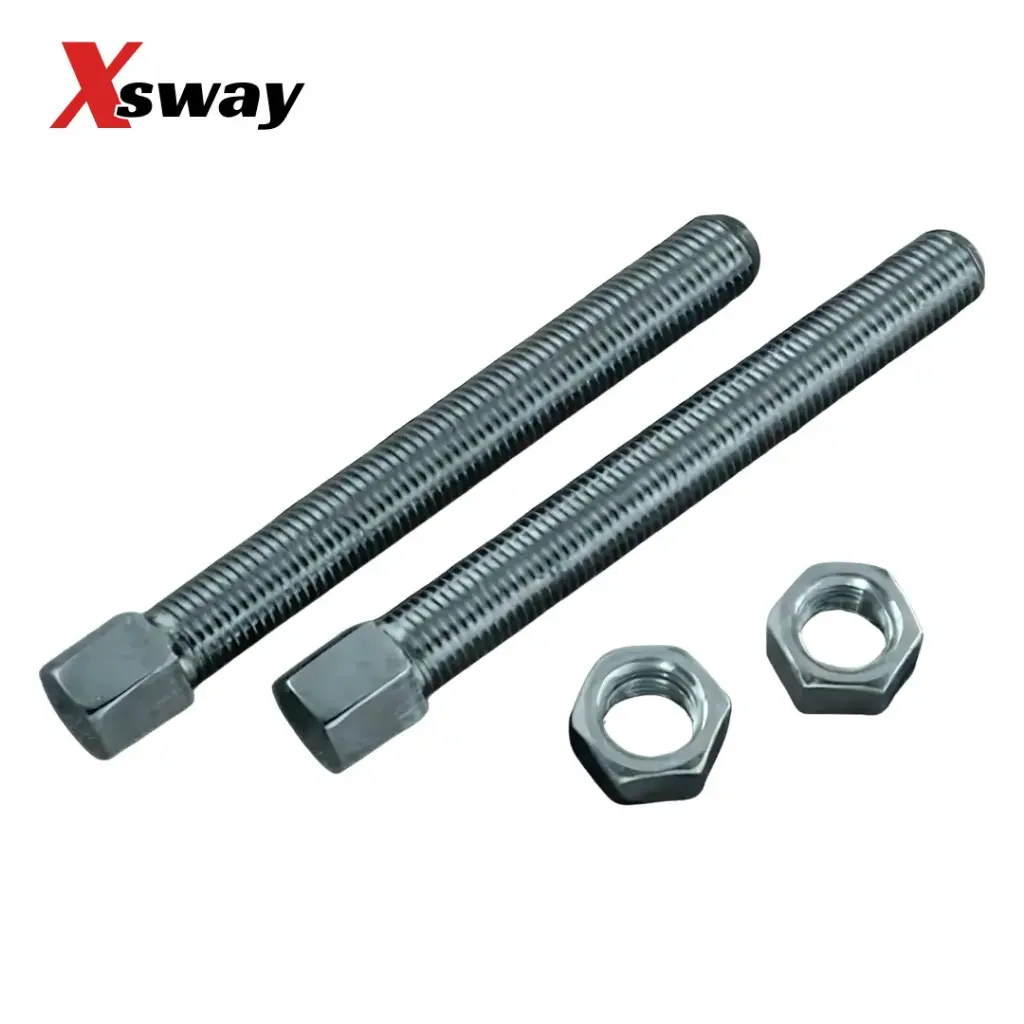
Screw Kit for All Rear Adjusters – 2 Nuts & 2 Bolts
Application: Universally compatible across all standard heavy-duty aftermarket rear weld-in or quick-adjuster housing assemblies (such as classic Porsche and Volkswagen air-cooled or buggy configurations).
Purpose: Serves as the primary mechanical lock and adjustment screw mechanism that sets and secures the resting angle of the internal torsion bar indexing arms.
Kit Contents:
2 High-Tensile Fine-Thread Adjustment Bolts
2 Matching Heavy-Duty Lock Nuts
(Completes a full left and right dual-adjuster overhaul).
Material: High-Strength Alloy Steel. Forged from premium, high-tensile fasteners selected specifically for their immense yield strength and resistance to thread stripping under severe compressive tension.
Precision Machining: Features ultra-precise, clean-cut fine threads that allow for micro-adjustments on the alignment rack or in the pits, delivering smooth mechanical rotation without catching or binding.
Structural Safety: Engineered to handle the full leverage of the rear suspension setup, ensuring that your target ride height remains firmly locked in place through harsh off-road impacts or high-speed track cornering.
❌ Never Run Stretched or Galled Bolts: If your existing adjuster bolts require immense force to turn even when unloaded, the threads have likely stretched or deformed from being over-torqued. Forcing a compromised bolt to hold up your vehicle’s rear weight is a severe safety hazard. Discard worn hardware immediately and install this fresh, high-tensile SKU 7011 kit to ensure structural safety.
⚠️ Safely Unload the Suspension Before Adjusting: Never attempt to turn the adjustment bolts while the full weight of the vehicle is resting on the tires. Attempting to force the bolts under total chassis load will cause immediate friction galling, stripping the new threads instantly. Always raise the vehicle safely on a lift or jack stands, and use a floor jack to subtly support the suspension arm weight, taking the extreme pre-load tension off the adjuster bolt before making height modifications.
❌ Apply High-Pressure Anti-Seize or Moly Grease: Because these adjustment bolts live on the underside of the chassis, they are constantly bombarded by water, road grime, mud, or track fluids. Prior to installation, apply a generous layer of high-pressure, waterproof anti-seize or a specialized molybdenum grease across the entire length of the bolt threads. This stops galvanic corrosion, prevents the steel threads from freezing or rust-welding into the adjuster housing, and guarantees effortless turnability for future tuning.
🔩 Lock the Jam Nuts Firmly: The matching lock nuts included in this kit are your primary defense against track vibration. Once you have dialed in your exact rear ride height and corner balance on the scale pads, run the jam nuts flush against the adjuster housing boss. Securely torque the nuts to specification to lock the adjustment bolt in place. Failing to tighten the jam nuts will allow the bolt to slowly back out under driving vibrations, resulting in an unexpected, uneven drop in rear ride height.
- ❌ Post-Settling Torque Check: High-performance suspension setups experience a settling period during the first few miles of driving as the spring plates and internal adjusters seat into position under dynamic load. It is highly recommended to inspect the assembly and verify the torque on both the adjuster bolts and jam nuts after the first 50 to 100 miles of operation to guarantee zero clamping pressure loss.
Premium Construction
🔧 High-Performance Rear Adjuster Hardware Tech Notes
Replacing and setting up rear adjuster locking hardware requires correct mechanical procedures to prevent thread failure or accidental ride height loss:
What’s Included
- 2 nuts
- 2 bolts
Warranty
Backed by a 1-year warranty for peace of mind.